Introduction
Layout Builder is a visual design tool that can be used to create custom layouts for content types, individual entities like mega-menu, and much more. In Drupal 8, it allows the site-builder or content editors to quickly create visual layouts by adding the blocks and displaying the content on the landing/basic pages. Users can customize how content is arranged on a single page, or even create custom landing pages with an easy to use layout interface.
Note: By default, the Layout Builder is not enabled on Drupal sites.
Steps to verify that the Layout Builder is enabled on the site
- Log in as an administrator on the website
- Navigate to the Extend tab
- Search for the “Layout Builder” module
- Verify that the “Layout Builder” module in Core is enabled on the website
.png)
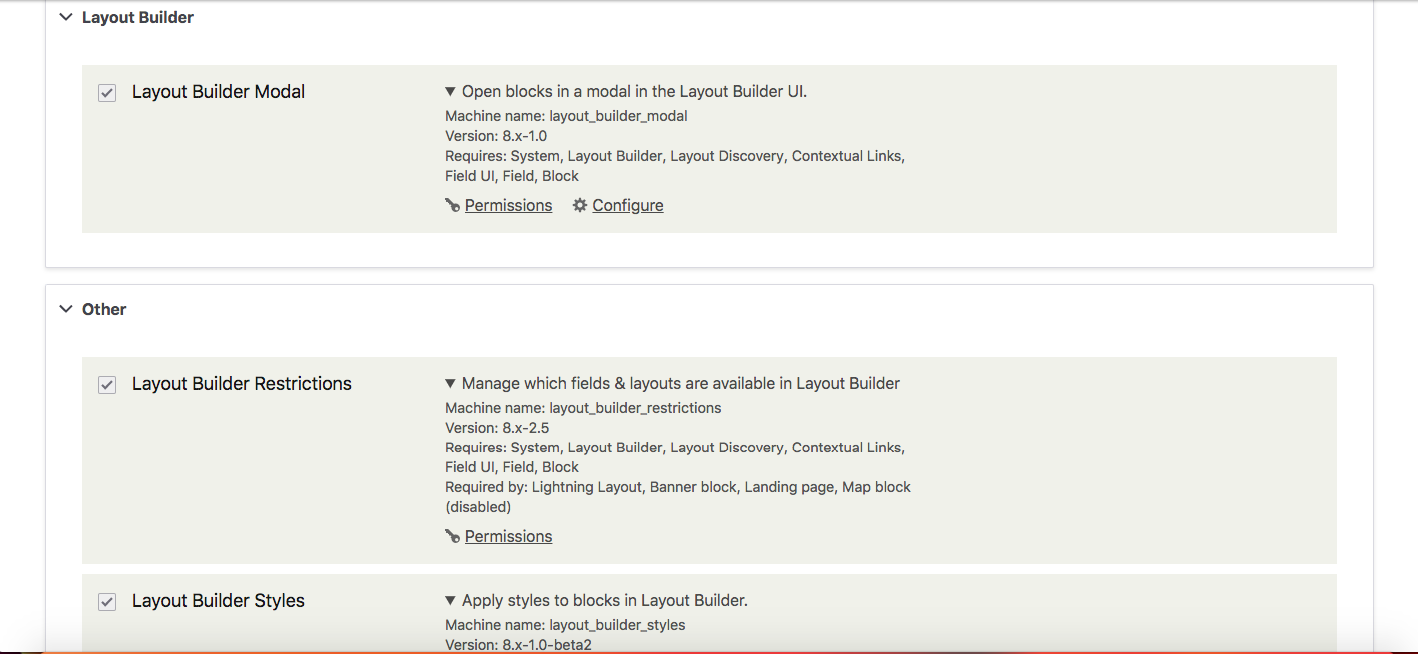
- Verify the other modules related to Layout Builder are also enabled on the site which is used for better UX, field restrictions, etc.
- Layout Builder Modal - It opens the block in a modal window for the Layout Builder UI
- Layout Builder Restrictions - It manages which fields and layouts should be available in Layout Builder
- Layout Builder Styles - It applies the theming styles to blocks in the Layout Builder
How to get started using the Layout builder?
- Steps to add custom blocks using the Layout Builder for content types
- Log in as an administrator/editor/site-builder role on the website
- Navigate to the Content -> Add content
- Click on the Basic/Landing page content type
- Enter the title and body description
- Save the node in Draft or any other state
- Verify that in view mode the user is able to see the “LAYOUT” tab

Note: If the ‘LAYOUT’ tab is not visible for the user, then follow the below steps to enable it for corresponding content types:
- Log in as an administrator role on the website
- Navigate to Structure -> Content Types -> Basic Page
- Click on the Manage fields option
- Click on the Manage display tab on the top
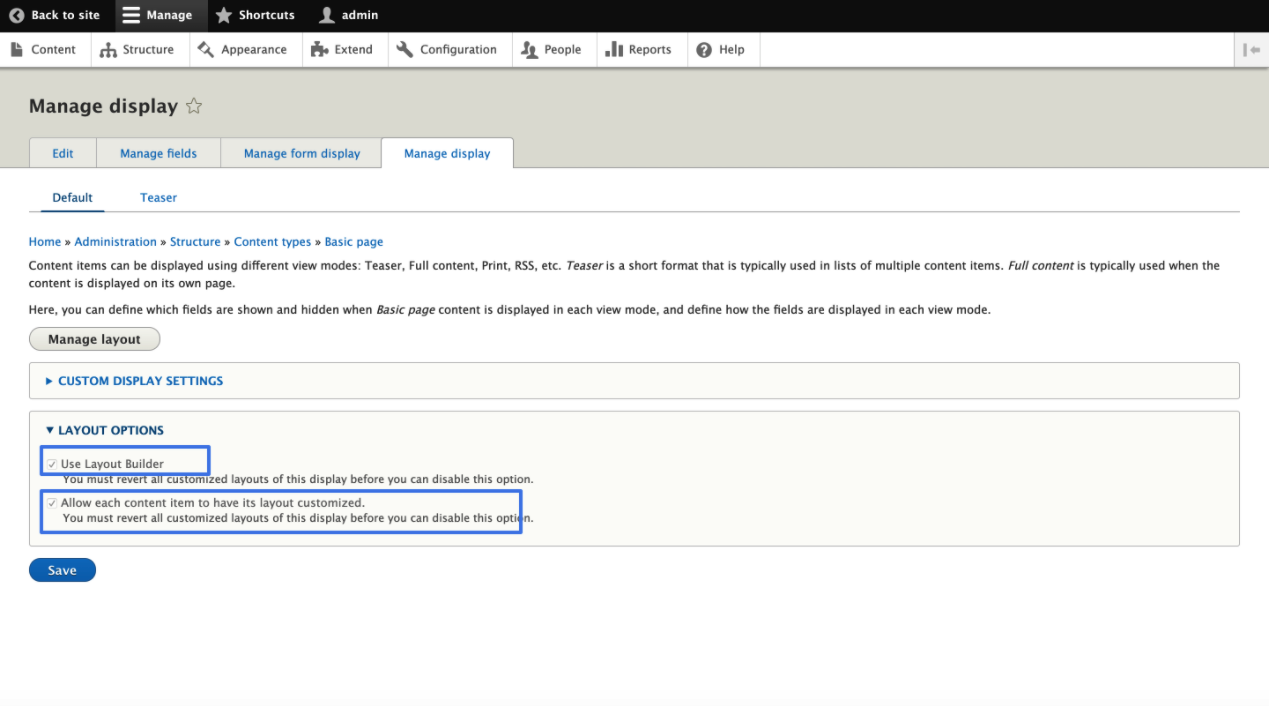
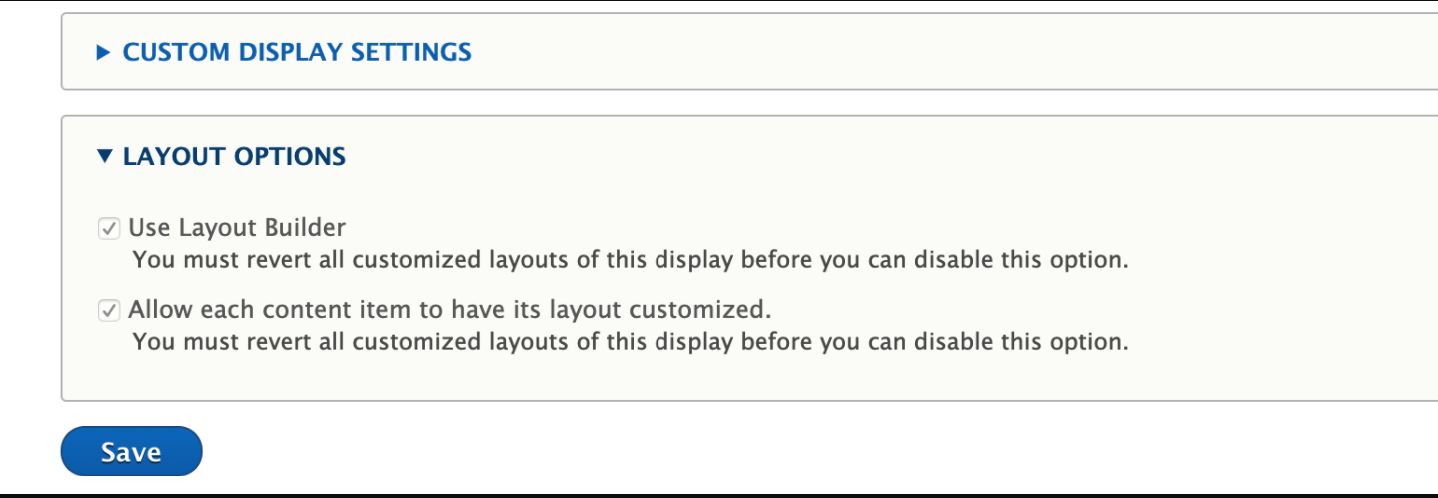
- Check the Layout options at the end
- Click on both the checkboxes 'Use Layout Builder' and 'Allow each content item'
- Click on the Save button and now check the basic page
- The layout tab should be visible on the basic page
- Click on the Layout tab after creating the basic page content type
- After clicking it, the page appears as shown below
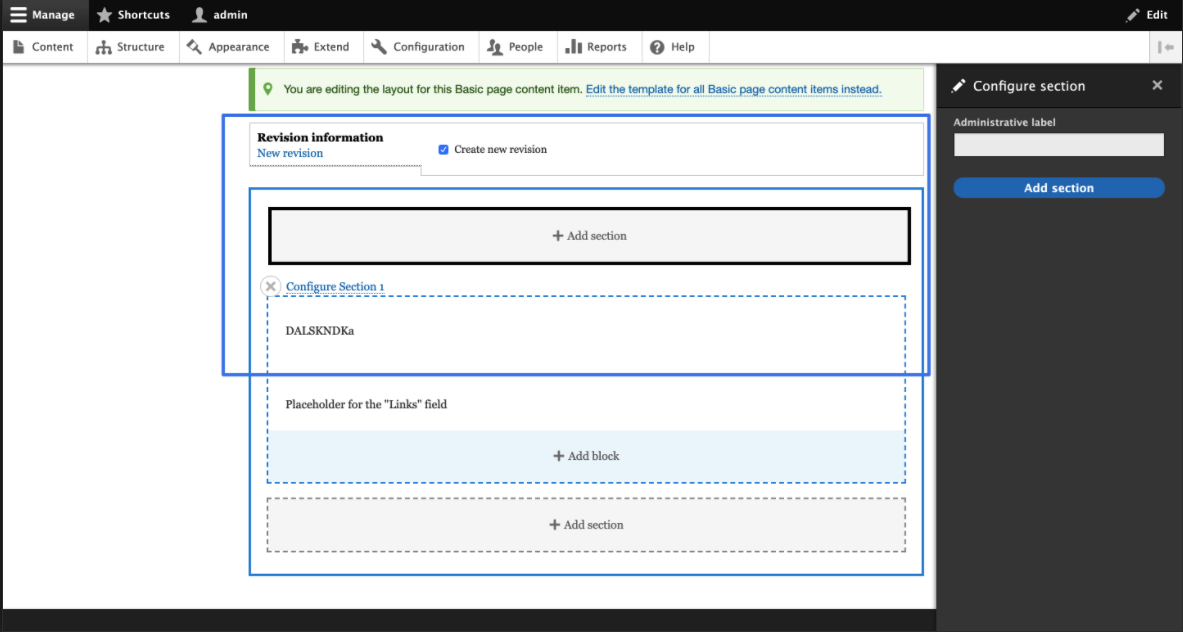
- Now, click on the “Add section” to add the layouts available on the site
- Add the one-column layout for this section and place it
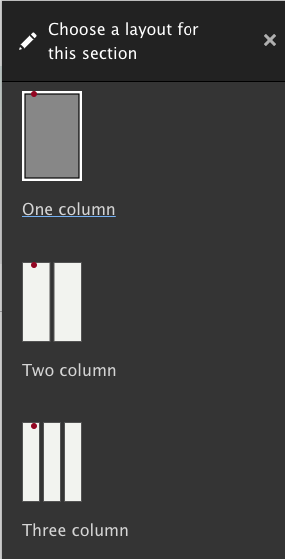
- Click on Add block and choose the custom block you want to place it on the site
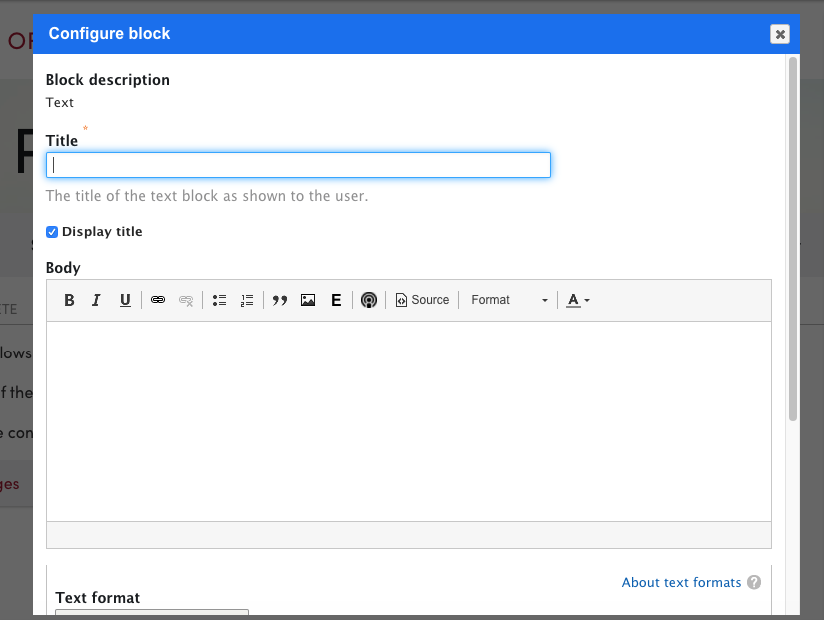
- Click on the TEXT custom block and it will open up in a modal window as shown below
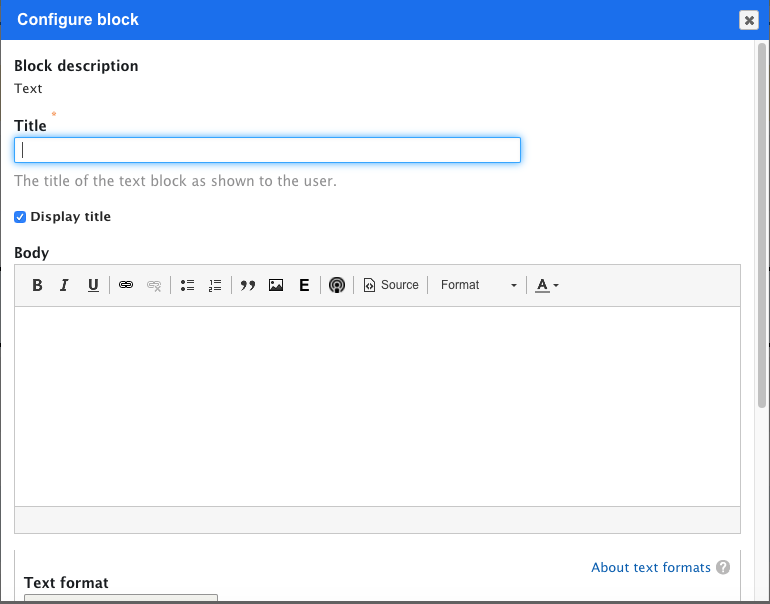
- Enter the title and body field and then click on the Add block button
- Verify that the block is placed successfully on the page
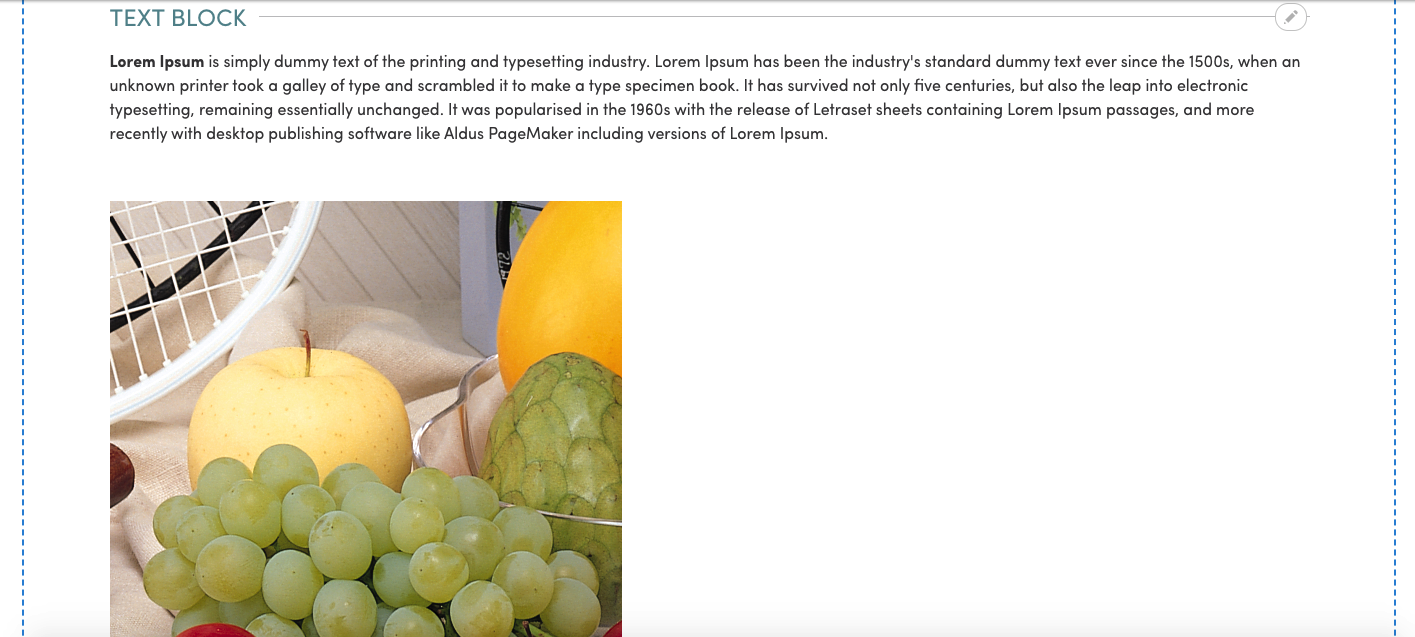
- Click on the Save layout button and verify the theming styles of the text block component on the basic page
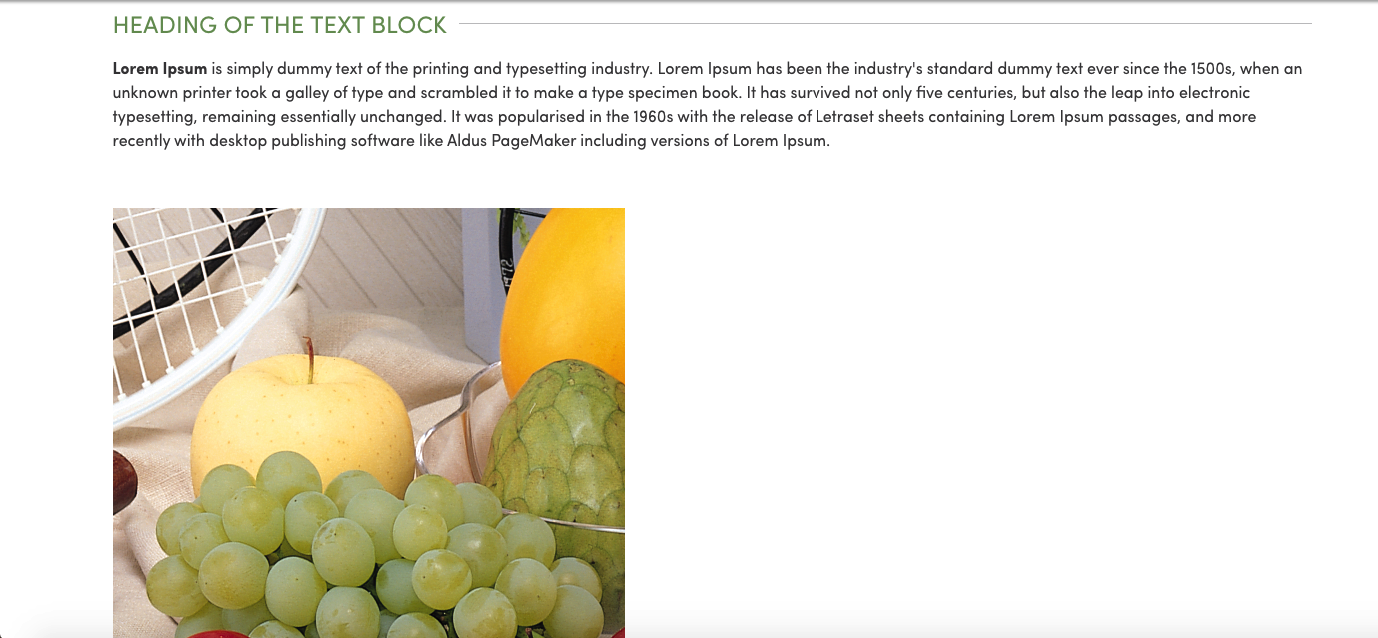
- Verify that the “title” of the text block should be displayed as per the mock-up designs
- Verify that the body content and image should be aligned as per the title of the text block
- In a similar way, add more custom blocks using the Layout Builder and verify the theming of each block as per the mock-up
- Click on ‘Add block’ to add more custom blocks on the basic page
Let’s see a few more examples that were used in an actual project.
Place the Image component block using a layout builder
- Click on Add block and select the Image component block and enter the title, attach the image, URL to link to the image and save the block.
- Verify the styling of the title and image after placing the block.
- Verify when the user clicks on Image text (white in color) then it redirects the user to the new tab with the external link.
- Verify the above test case for the internal links also.
.png)
Place the contact block using a layout builder
- Click on Add block and select the Contact block from the custom block list. It opens the form in a layout modal window.
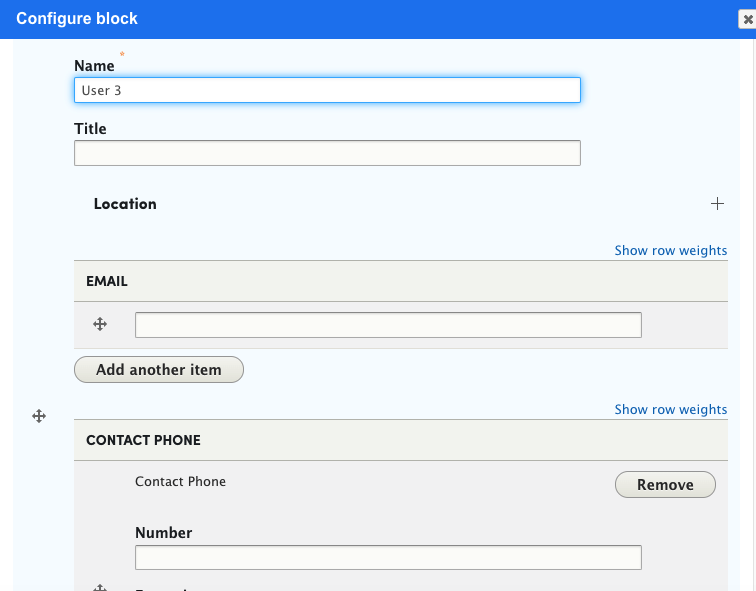
- Enter the name, title, email, phone number, and click on the Add block button. It’s a multi-value field so the user can add multiple contact blocks.
- Repeat the above step and add three contact blocks for different users.
- Click on Add block and verify them on the Layout Builder section.

- Click on the Save layout option.
- Verify the contact block theming on view mode of the basic page.
- Verify that the name, email-id, phone number are appearing as per the mock-up designs.
- Verify that when the user enters multiple values to email-id or phone number field for a single contact block then the theming should not break for the page-layout.
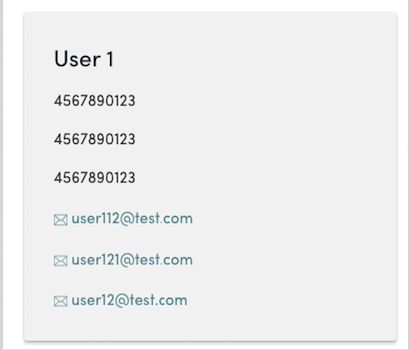
- Verify that the theming should not break when the user enters multiple values in the above fields.
- Verify that the other two blocks’ height should expand compared to the first block to match the level.
Place the Mega-menu links using a layout builder
- Go to Structure -> Menus -> Main Navigation
- Add the menu links in the hierarchical structure like parent-child relation
- Verify that the Layout Builder is enabled for the main navigation menu links on the site
- Verify that on editing any menu link, the user is able to see the Layout tab.
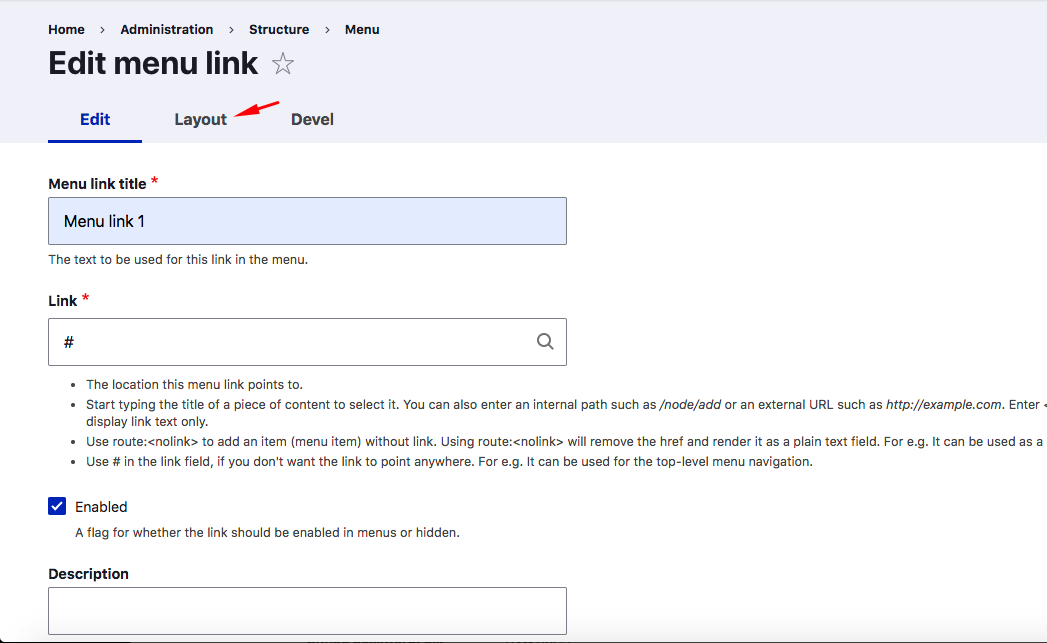
- Verify that the user is able to configure the section and add the blocks using the Layout Builder module for the main-menu links
- Verify for the click to Add block option if the user is able to see the Menus in the Layout Builder
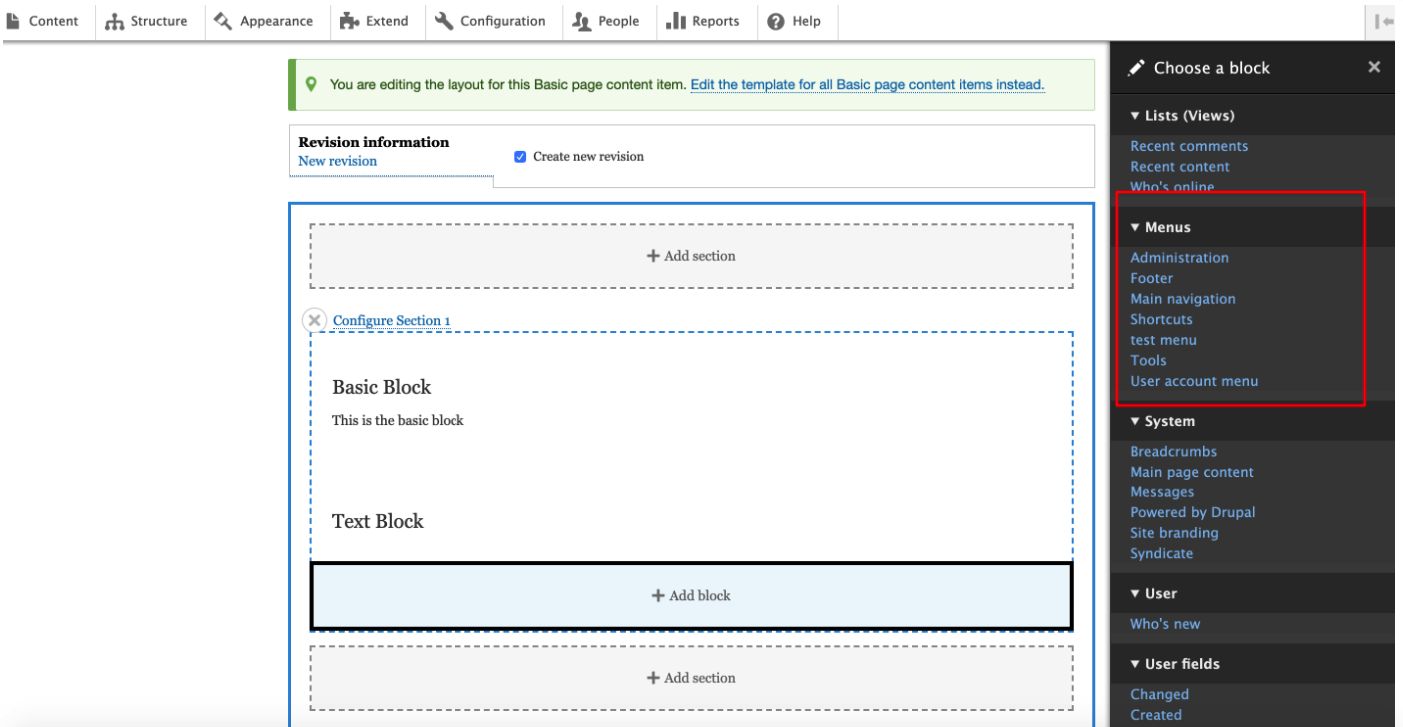
- Verify that on click to Menus, the layout modal window opens up which helps the user to place the menu on the layout section
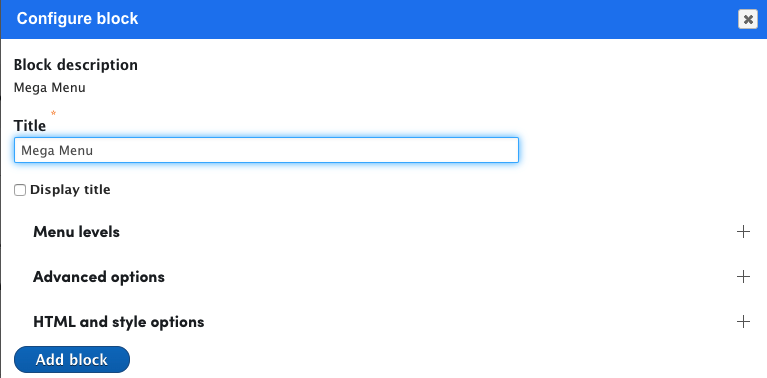
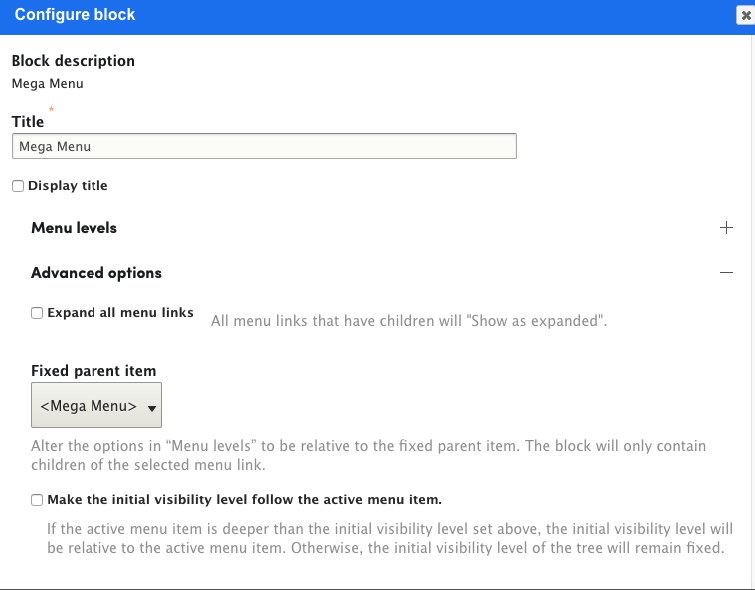
- Verify that on click to Advanced options in the above screenshot, the user is able to set the Fixed Parent item on adding the menu-block
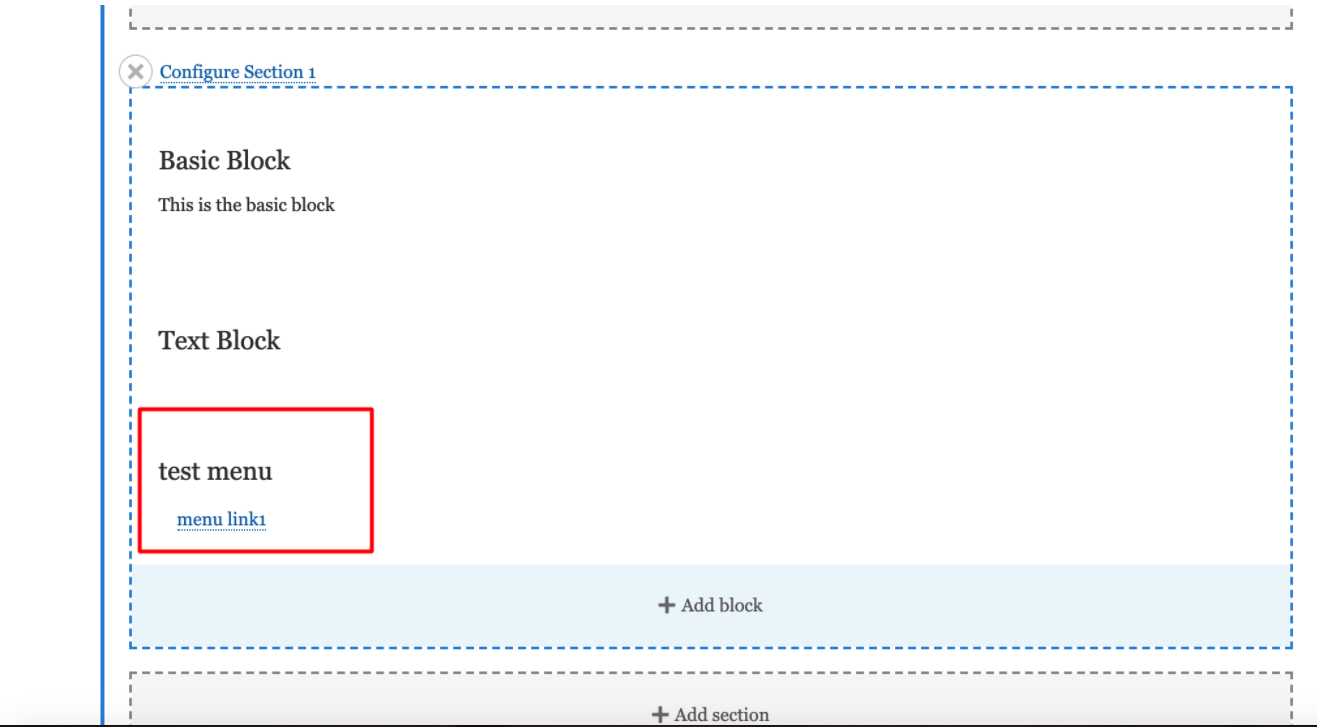
- Verify that after placing the menu-block, the main-menu links are appearing on the layout-section of the page
- Verify that after saving the layout, the menu-links appear on the view mode of the basic page below the header
- Verify the menu links are visible for the anonymous user
Usability issues after placing the blocks
Below are some of the UI issues related to the Layout Builder module that was identified while testing the site:
- Media not getting attached to the correct field in the Layout Builder. This appears to be the Drupal core bug and has been logged on the drupal.org website here.
- The user was not able to edit the custom menu block, which was placed on the basic page using the Layout Builder. The pencil icon for configuring the block was missing even for the admin users on the site.
Before:
.png)
After:
.png)
- The fields are not visible properly of a content type when trying to add it using a Layout Builder. The user was not able to fill in the details because of this issue when there were more than 40 fields inside one content type. Refer to the below screenshot where the option to set the Date field using a calendar view is impossible. Verify that "Date" fields are half-hidden and the user is not able to click or select the current date from the calendar view. To fix this issue layout modal window is enabled and installed on the site.
- CTA field added inside content-type/custom blocks.

- Auto-complete results appear on top when the user searches the internal URL in the CTA field, as shown below.
.png)
.png)
Now that these steps are completed, you can learn to Configure The Layout Builder In Drupal 8 to complete your understanding of the Layout Builder module.

Nikita Jain, Quality Assurance Staff Engineer
"Nikki" is a shopaholic with wanderlust, who loves Bollywood movies and good food; offline, you'll find her doting on her beautiful baby girl.
 We respect your privacy. Your information is safe.


Leave us a comment