Introduction
We wanted to learn about automation and we came across Cypress.io and found some exciting features which fulfilled our requirements. In this blog, we will be sharing some basic concepts of Cypress, as follows:
- What is Cypress?
- Why install Cypress?
- Prerequisites to Install cypress
- Cypress installation
- Folder structure and basic test
- Headless execution using the command line
- Execution on chrome, with Runner
What is Cypress?
Cypress is a Java-Script based testing framework that allows the execution of tests in a browser much similar to Selenium. Cypress comes with easy and hassle-free installation and a ready-to-use set of example tests that help understand what capabilities cypress offers and how to use them to write tests.
Why Cypress?
There are many tools in the software industry, so why use Cypress? Given below are some salient features on why Cypress is a good option for automation purposes:
- Open-source: Cypress is an open-source tool, which makes it easily accessible to anyone who wants to start with automation and also contribute back to make it better based on their experiences.
- Easy Setup: Cypress Installation is very easy and fast. It makes it easy to:
- Set up tests
- Write tests
- Run tests
- Debug Tests
- Also, with Cypress, you can write automated test scripts to test:
- Functionality
- APIs
- User Interface: Across browsers and across various mobile devices
Installing Cypress? Here is the pre-installation required
To install cypress on your system, you need the following on your system:
Quick steps to install Cypress
Cypress installation is quick; you need to follow the below steps:
- Create a directory on your system where you will install cypress, using the command mkdir cypress
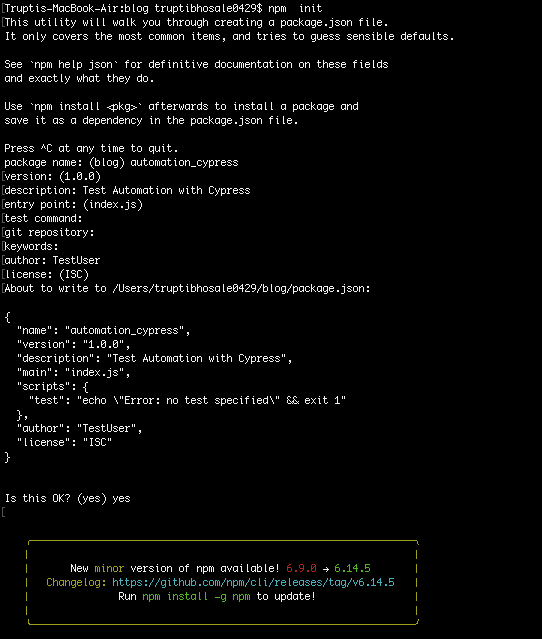
- Cd into the cypress directory, run the command npm init to initiate the Cypress installation. Once the installation begins, you will be asked these simple details:
- Package name: Mention the package name for the cypress project that they need to start. If it is kept blank, then by default, the name would be cypress
- Version: Mention the version of the cypress automation project; the default version would 1.0.0
- Description: Mention a short description of the project
- Entry point: The entry point is by default set as index.js where the configurations are made. Click enter to navigate to the next step
- Test command: Enter a test command in this field or keep it blank and hit enter
- Git repository: Enter the git repository path
- Author: Enter the Author name for the project and hit enter
- License: By default, the license entered is (ISC) just hit enter to begin the process
- Once you hit enter, the entire details will be displayed, and the user needs to confirm by typing a yes
- npm install cypress --save-dev
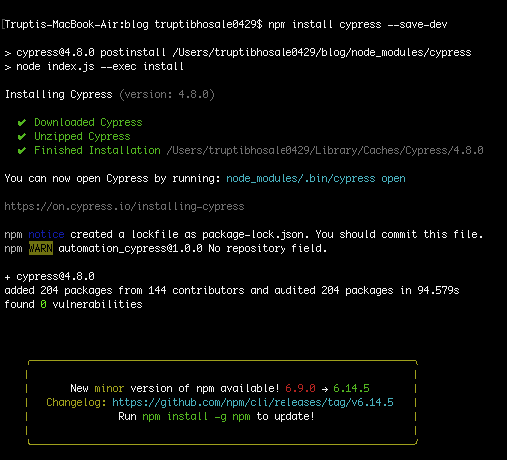
- Cypress will get installed at the ./node_modules directory.
- Open the cypress project folder in VS code editor or any of your preferred editors.
Cypress Directory Structure
When the cypress installation is completed, you can see some folders in the project directory as the below details. This is the default directory structure which cypress follows:
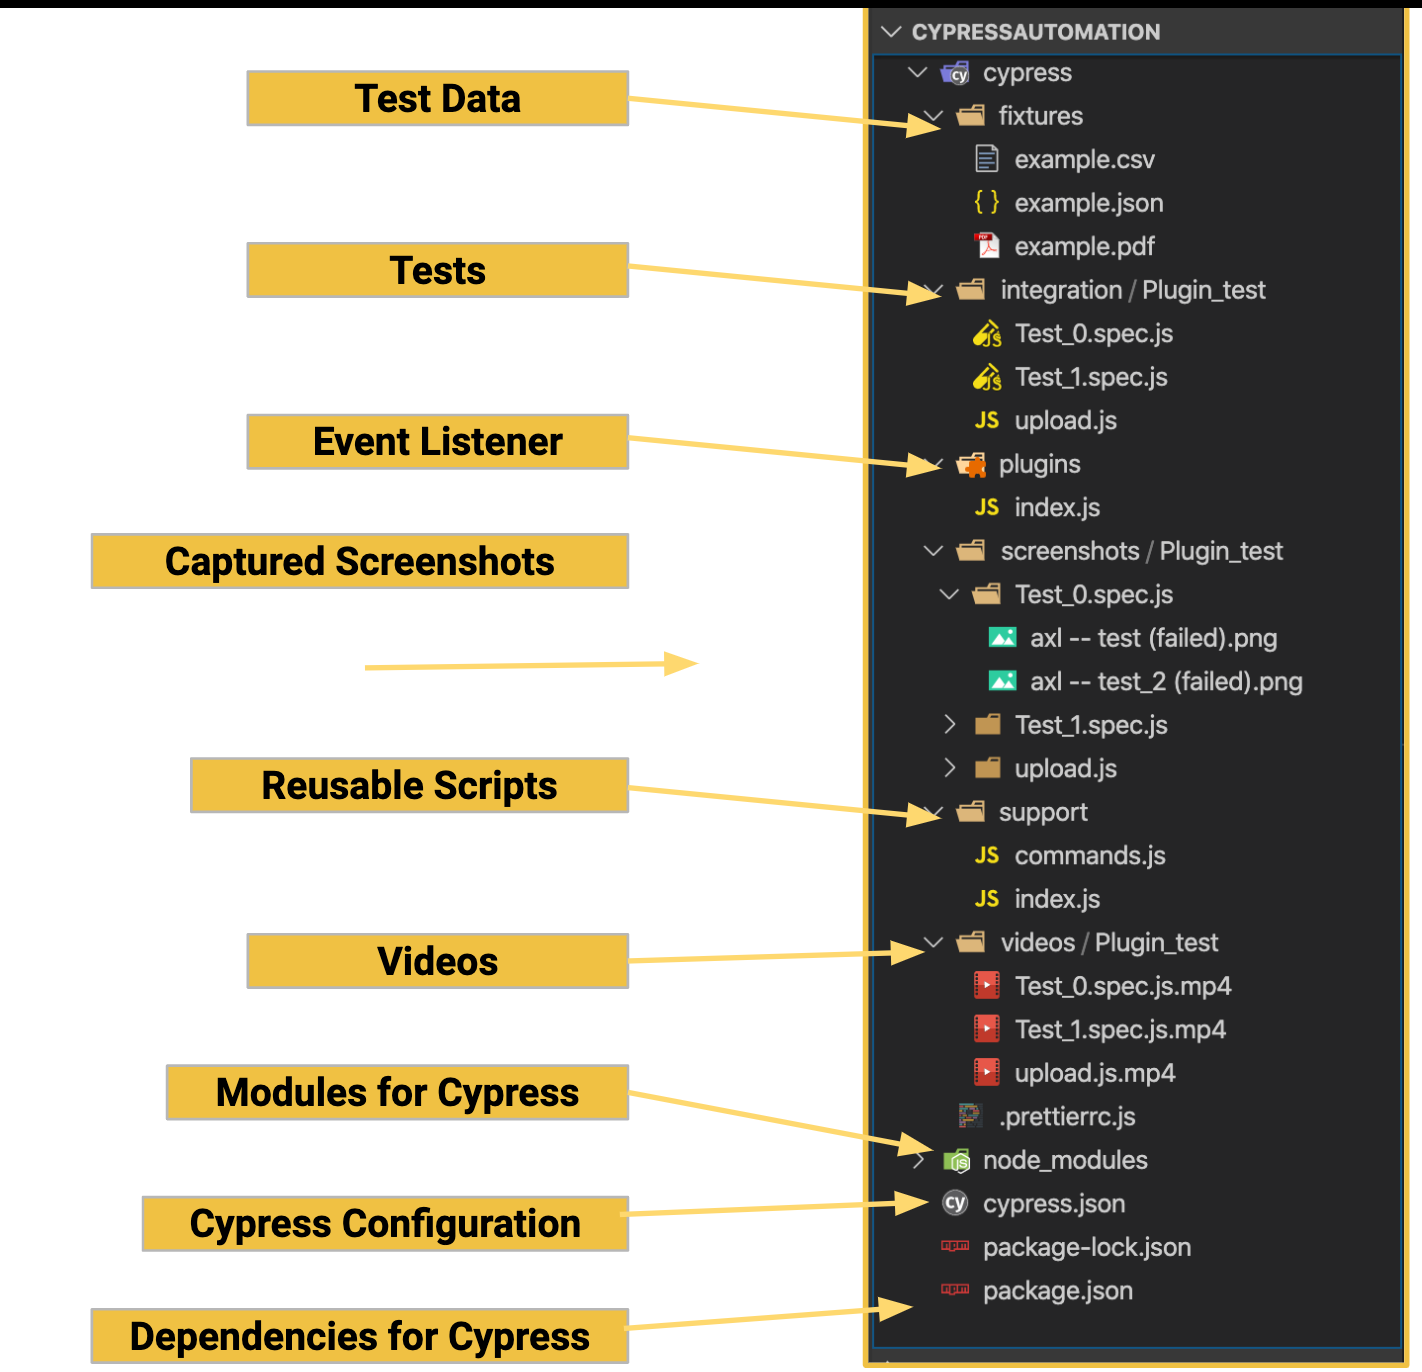
Test Data (fixtures)
The fixture is a directory present in cypress where the user can maintain all their test data files required for test execution. Users can store data in the form of a JSON file, XML file, or any document.
Tests (Integration)
Inside the integration folder, you can either create a folder to better organize your tests and add your test cases or you can directly add test cases for your application.
Event Listener (Plugins)
The Plugins folder contains the event listener. As we know, event listeners maintain the record of all the events and respond (Pass/Fail/Wait) according to the execution of the events. In Cypress, the index.js file acts as an event listener.
Captured Screenshots(Screenshots)
This screenshot folder will be created automatically whenever a screenshot is captured during the test execution:
- Cypress has an inbuilt feature that captures screenshots whenever the test fails. You can disable this feature via adding a command in the cypress.json file. Command to disable the cypress

- Disable screenshot inside spec by using the following command:

- You can capture screenshots using few commands like:
- cy.screenshot()
- cy.screenshot({ x: 10, y: 10, width: 200, height: 150 })
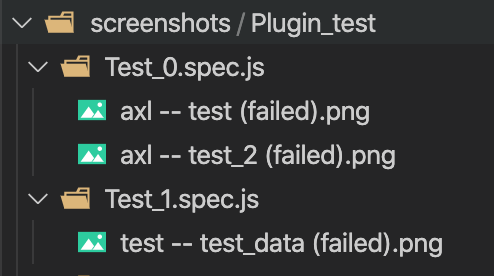
- Cypress can smartly store all screenshots of the test execution. As you can see from the image, I created a folder ‘Plugin_test’ which has a test file ‘Test_0.spec.js’, this spec.js file has a Test Suite named ‘axl’ which has two test case ‘test’ and ‘test_2’.
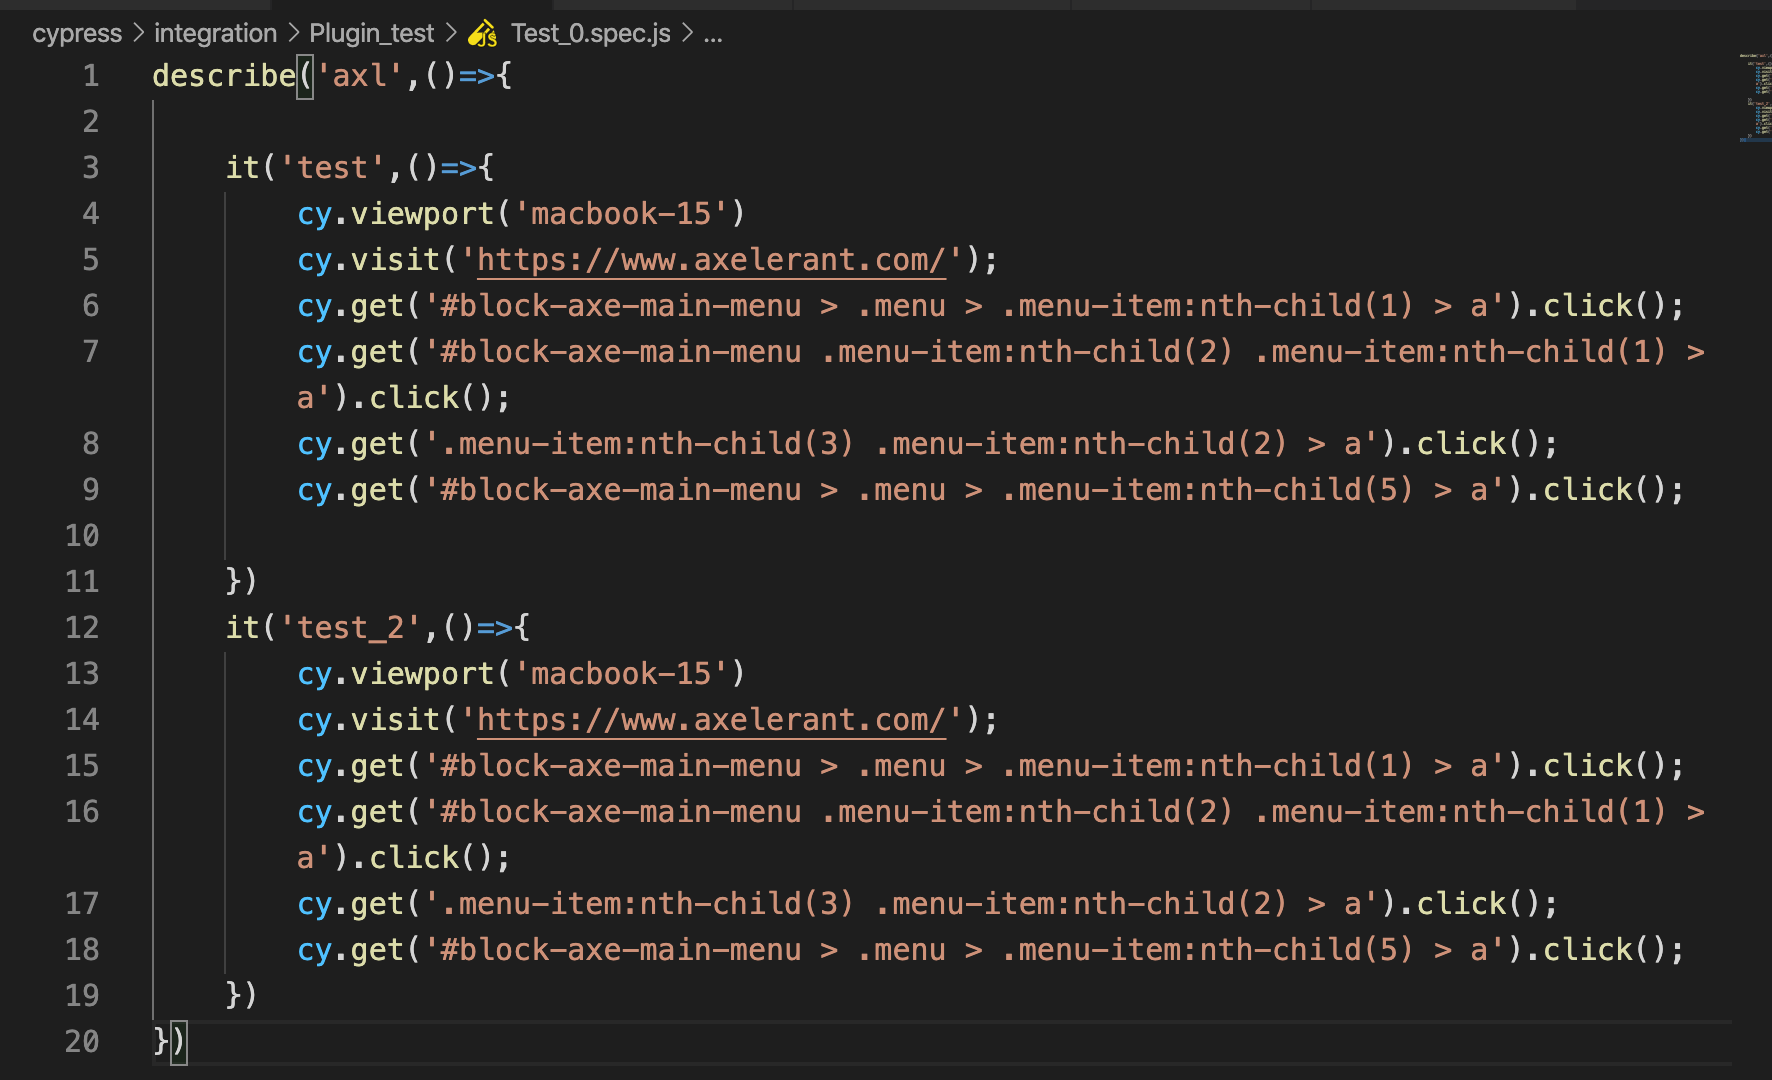
If the above tests fail during execution, cypress captures screenshots and creates a folder “screenshots” as shown in the below screenshot.
Support(Reusable Scripts)
The support folder is used to store the script for reusable behaviors such as custom commands or any global function which we want to use in all spec file.
Videos
Cypress records a video for each spec file when running cases in headless mode.
Modules for Cypress (Node_modules)
Node_modules is the main folder of the cypress as it stores all the npm files and dependencies required to run the test.
Cypress.json
Cypress.json is used to store all the configuration data like the base URL, timeout, on/off screenshots for the failed test, on/off the video for headless test executions.
Package.json
The Package.json file contains metadata and required libraries from the project. Also, it is used to identify the project and to store the dependencies for the project.
Writing your first test in Cypress
- Before writing your very first test in Cypress, create a folder under the integration folder (for eg. Login)
- Create a file under the Login folder where you will write the test, eg test_spec.js
- Below is the sample code which you can add to your test_spec.js file
- Here we have created a suite named “Logintest” and in that, we have written a test case to verify the Login functionality
Test Execution
When cypress installation is completed you can see some folders in the project directory as the below details. There are two ways in which we can execute the Cypress script as listed below:
Execution Using Terminal
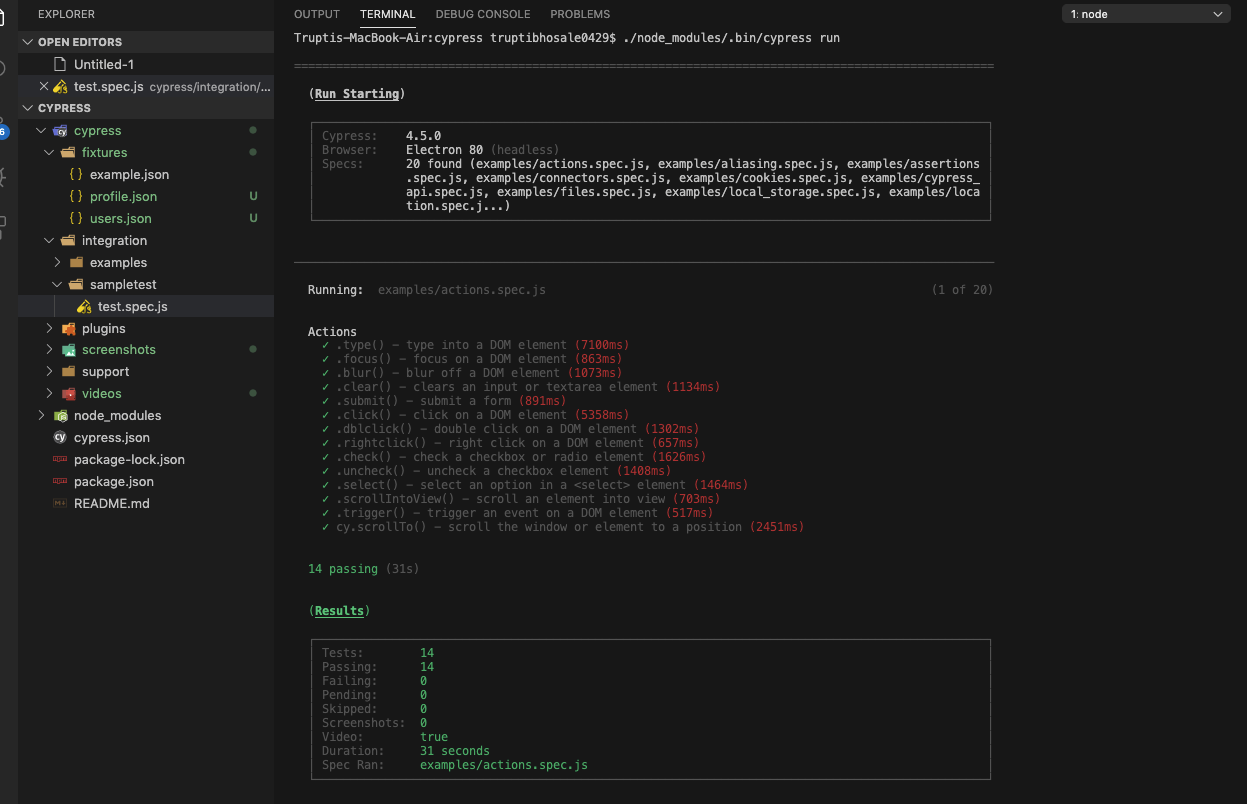
- You can execute the tests in cypress in headless mode by executing the command in the Visual Studio code terminal
./node_modules/.bin/cypress run
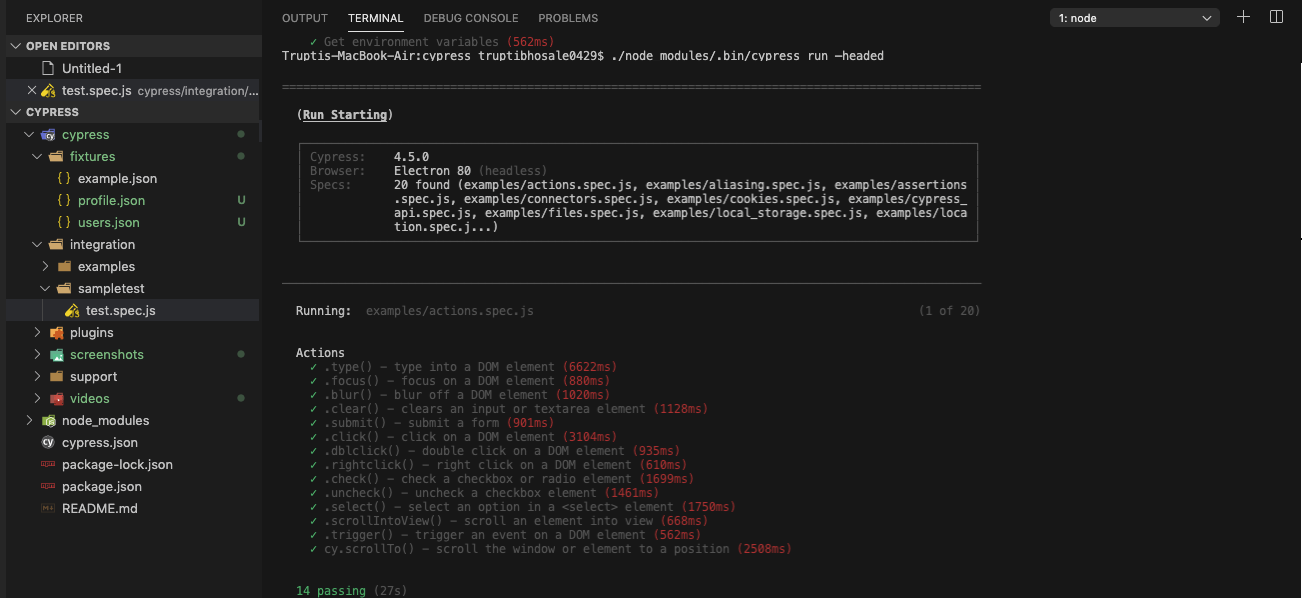
- To execute the tests in browser mode use the following command, by default electron browser will be used
./node_modules/.bin/cypress run —headed
- To execute specific tests in headless mode using the following command
./node_modules/.bin/cypress run —spec “path”

Execution using Cypress GUI / Test runner
- Open the cypress GUI by running the following command in the terminal
./node_modules/.bin/cypress open
- Once the runner opens, you can see the test in the folder you created
- Run the test by clicking on the spec file and you can see the tests executing on the chrome browser
Cons of Cypress
Despite all advantages, Cypress has some limitations as well. We have listed the two main limitations in brief:
- Cypress does not provide multi-tab support.
- You cannot use cypress to run tests on two browsers simultaneously
To read about these limitations in detail, please visit their trade-offs page.
In the past few months, we have learned Cypress collectively. Based on our experience we would recommend any newbie to the world of Test Automation to try Cypress.
The Usability of Cypress for test executions is a key highlight of our experience as it provides good visibility during executions and helps us understand better. The main perks that Cypress provides are the predefined functions, which made writing test scripts much easier for us. The best part of Cypress is its rich documentation & when coupled with its awesome inbuilt environment, makes it a comprehensive tool.
So this was our experience while learning Cypress. If you also find it interesting go ahead and introduce some end-to-end tests in your application. Also, let us know your experience while learning Cypress.

Parita Patel, QA Engineer - L2
She loves singing and being around children and the elderly, and can’t stand the sight of a bug in her food! Off work, you’ll find her spending quality time with her family.
 We respect your privacy. Your information is safe.


Leave us a comment